An RV repair and maintenance manual is a comprehensive guide providing step-by-step instructions for troubleshooting, maintaining, and repairing various systems, ensuring optimal performance and safety.
Importance of RV Repair Manuals
An RV repair manual is essential for ensuring the safety and longevity of your recreational vehicle; It provides detailed instructions for troubleshooting, maintaining, and repairing various systems, helping you avoid costly breakdowns. By following the manual, you can identify issues early, perform routine checks, and ensure optimal performance. It also serves as a guide for DIY repairs, saving money on professional services. The manual covers critical areas like electrical, plumbing, and chassis maintenance, offering step-by-step procedures in easy-to-understand language. Whether you’re a seasoned RV owner or a newbie, having a comprehensive manual ensures you’re equipped to handle emergencies and maintain your vehicle’s condition. It’s a vital resource for anyone aiming to extend their RV’s lifespan and enjoy hassle-free adventures. Regular use of the manual promotes safety, efficiency, and confidence in managing your RV’s upkeep.
What to Expect in an RV Repair Manual
An RV repair manual is a detailed resource designed to help owners maintain and repair their vehicles effectively. It typically includes troubleshooting guides, maintenance schedules, and step-by-step repair instructions for various systems, such as electrical, plumbing, and chassis components. The manual often features diagrams, charts, and illustrations to simplify complex procedures. You can expect to find information on routine checks, parts replacement, and safety precautions to ensure proper handling of repairs. Many manuals also cover warranty details, appliance maintenance, and specific brand recommendations. Written in clear, user-friendly language, these guides empower RV owners to address issues confidently. Whether you’re addressing minor fixes or major overhauls, an RV repair manual provides the essential knowledge to keep your vehicle in top condition and extend its lifespan. It’s a one-stop solution for all your RV maintenance needs.
Benefits of Using a Comprehensive Guide
A comprehensive RV repair and maintenance manual offers numerous benefits for owners. It empowers you with the knowledge to handle repairs confidently, saving time and money by avoiding unnecessary trips to professionals. The guide provides clear instructions, ensuring safety and preventing further damage. With detailed step-by-step procedures, you can address issues efficiently, whether it’s routine maintenance or complex repairs. A good manual also helps you understand your RV’s systems better, enabling proactive care and extending its lifespan. Additionally, it serves as a valuable resource for diagnosing problems and finding solutions quickly. By following the manual, you can ensure your RV remains in optimal condition, enhancing your overall ownership experience. It’s an indispensable tool for every RV owner, fostering independence and peace of mind on the road.
Understanding Your RV Repair Manual
Your RV repair manual is a detailed guide designed to help you master its functions, ensuring safety and optimal performance through clear instructions and structured organization.
Structure and Organization of the Manual
The RV repair and maintenance manual is meticulously organized to ensure easy navigation and understanding. It typically begins with a table of contents, followed by detailed sections covering diagnostics, maintenance schedules, and repair procedures. Each chapter is dedicated to specific systems, such as electrical, plumbing, and chassis, providing step-by-step instructions. The manual includes diagrams, charts, and illustrations to simplify complex tasks. A troubleshooting section helps identify common issues and their solutions. Appendices often feature wiring diagrams, parts lists, and conversion charts. The logical structure allows users to quickly locate relevant information, making it an indispensable resource for both novice and experienced RV owners. This clear organization ensures that users can efficiently address repairs and maintenance, promoting safety and extending the vehicle’s lifespan.
Key Sections Every RV Owner Should Know
Every RV owner should familiarize themselves with key sections of the repair manual to ensure proper maintenance and troubleshooting. The manual typically includes a maintenance checklist, detailing routine inspections for brakes, tires, and fluid levels. Another critical section covers electrical systems, providing diagrams for wiring and circuit breakers. The plumbing section explains how to winterize pipes and address leaks. Safety guidelines are also emphasized, outlining proper procedures for propane systems and battery maintenance. Additionally, the manual includes a troubleshooting guide for common issues like faulty appliances or engine problems. Understanding these sections empowers owners to address minor repairs and prevent major breakdowns. By referencing these key areas, RV owners can maintain their vehicle’s performance, safety, and longevity, ensuring enjoyable and stress-free travels;
How to Navigate the Manual Effectively
Navigating an RV repair and maintenance manual requires a systematic approach to ensure you find the information you need quickly. Start by reviewing the table of contents or index to locate specific sections, such as troubleshooting guides or maintenance schedules. Many manuals include diagrams and illustrations to help visualize complex systems, like electrical wiring or plumbing layouts. Pay attention to safety warnings and precautions highlighted throughout the manual. Use the troubleshooting section to identify common issues and their solutions. Familiarize yourself with the manual’s organization, often divided by system type (e.g., electrical, plumbing, or chassis). Referencing the manual regularly will help you understand its structure and improve your ability to locate information efficiently. Always download or save the manual in a convenient format, like PDF, for easy access during repairs or maintenance tasks.
Essential Tools and Equipment for RV Maintenance
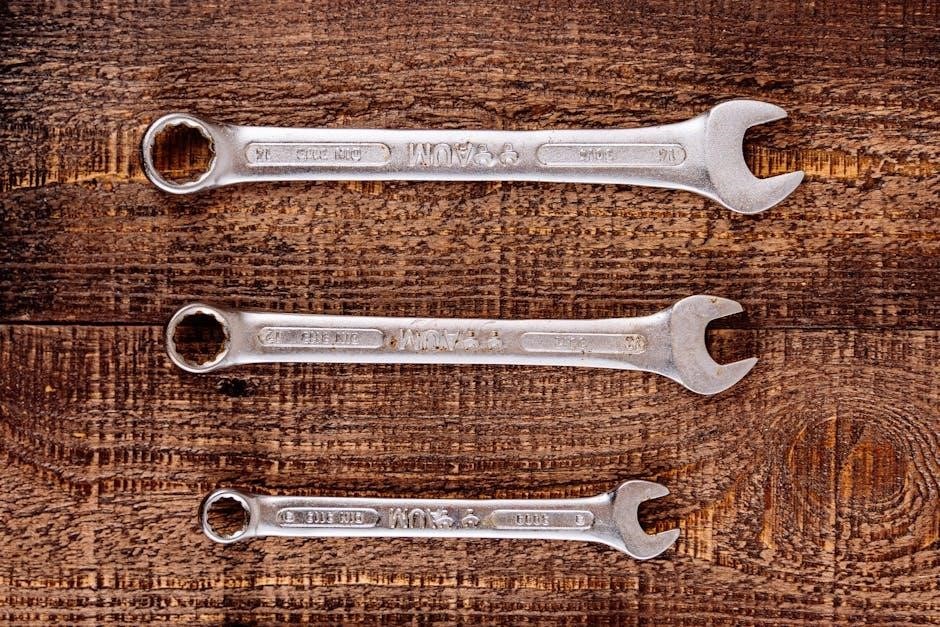
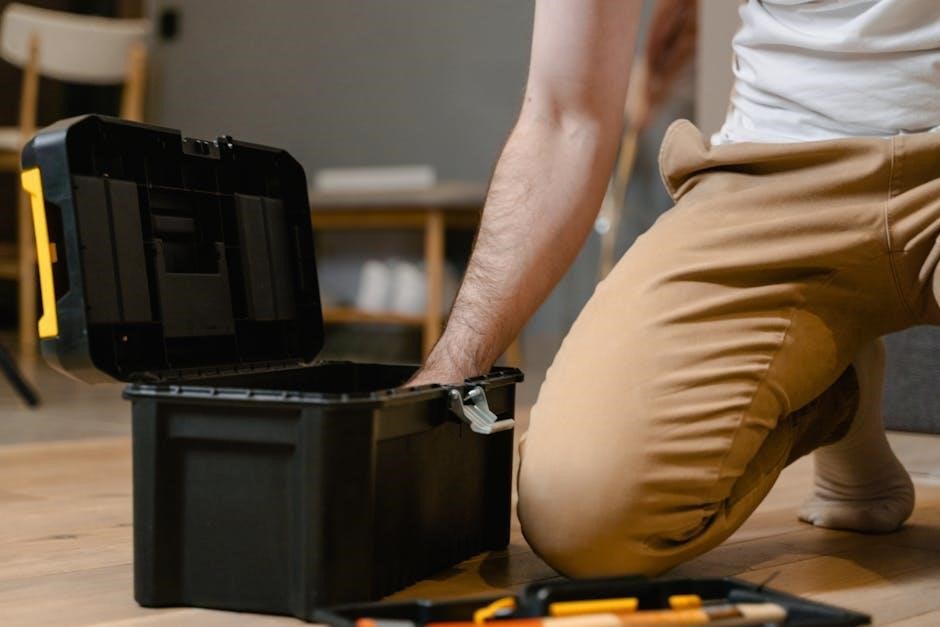
Stock a toolkit with pliers, screwdrivers, wrenches, and a multimeter for electrical work. Include an air compressor, tire pressure gauge, and torque wrench for chassis and tire maintenance. Ensure safety and efficiency with the right tools.
Basic Tools Every RV Owner Should Have
Every RV owner should have a well-stocked toolkit to handle basic repairs and maintenance. Essential tools include pliers, screwdrivers (both flathead and Phillips), wrenches (adjustable and fixed), and a socket set. A multimeter is crucial for diagnosing electrical issues, while a tape measure and level ensure accurate installations. Add a utility knife, duct tape, and rope for quick fixes. A tire pressure gauge is vital for monitoring tire health, and a basic toolkit should also include a hammer, wire cutters, and a set of Allen keys. These tools will empower you to tackle minor repairs confidently and keep your RV in top condition. Always refer to your RV repair manual for specific tool recommendations tailored to your vehicle’s needs.
Specialized Tools for Advanced Repairs
For advanced RV repairs, specialized tools are essential to ensure precision and safety. A circuit tester is vital for diagnosing electrical system issues, while a brake bleeding kit helps maintain hydraulic brake systems. A plumbing pressure test kit is necessary for identifying leaks in water lines. Specialized wrenches, like an anode rod wrench, are required for water heater maintenance. A roof sealant kit is crucial for repairing leaks in the RV’s roof. Additionally, a propane leak detector ensures safety when working with gas systems. A multimeter with advanced features is useful for complex electrical diagnostics, and a torque wrench ensures proper tightening of bolts and nuts. These tools empower RV owners to handle more intricate repairs confidently, reducing the need for professional assistance. Always consult your RV repair manual for specific tool recommendations tailored to your vehicle’s systems.
Safety Equipment for DIY Repairs

Safety equipment is crucial for DIY RV repairs to protect yourself and ensure a secure working environment. Essential items include safety glasses to guard your eyes from debris and gloves to prevent cuts and abrasions. A fire extinguisher is a must-have in case of emergencies, and a first aid kit should always be within reach. Steel-toe boots provide protection from heavy tools or falling objects. A propane gas detector ensures safety while working with gas systems, while an emergency escape window crank can be lifesaving in critical situations. A ladder with a safety harness is recommended for elevated tasks, and a work light with a secure power source helps illuminate dark spaces. Always prioritize safety to avoid accidents and ensure successful repairs.

Regular Maintenance Practices
Regular maintenance ensures optimal RV performance and longevity. It includes routine inspections, checking fluid levels, maintaining battery health, cleaning exterior surfaces, and ensuring all appliances function properly.
Schedule for Routine Checks and Maintenance
A well-structured schedule is crucial for maintaining your RV. Begin with daily checks, such as inspecting tire pressure, ensuring all lights function, and verifying battery charge levels. Weekly checks should include examining fluid levels (coolant, oil, and propane), cleaning or replacing air filters, and inspecting hoses for leaks or damage. Monthly tasks involve deeper inspections, like checking the condition of the roof and exterior seals, testing the plumbing system for leaks, and ensuring appliances are in good working order. Annual maintenance should include servicing the generator, lubricating moving parts, and performing a comprehensive inspection of electrical and plumbing systems. Always refer to your RV’s specific manual for model-specific recommendations. Staying consistent with this schedule ensures your RV remains reliable, safe, and ready for adventures. Regular checks also help prevent costly repairs by addressing issues early.
Step-by-Step Guide to RV Inspection
Start your RV inspection by examining the exterior for damage, dents, or cracks. Check the roof seals and sidewalls for any signs of leaks. Inspect tires for proper inflation, tread wear, and lug nut tightness. Next, move to the interior, ensuring all appliances, including the refrigerator, stove, and HVAC, are functioning correctly. Check for water leaks under sinks, around toilets, and in the shower. Test the electrical systems, including circuit breakers and outlets, to ensure they are working properly. Inspect the propane system for leaks and verify the generator is operational. Finally, test safety devices like smoke detectors and propane detectors. Use a checklist to track your progress and address any issues immediately. Regular inspections help identify potential problems early, ensuring your RV remains safe and reliable for years to come. Always prioritize thoroughness to avoid overlooked issues.
Tips for Extending the Life of Your RV
To extend the life of your RV, start by regularly cleaning both the exterior and interior. Remove dirt, dust, and mildew to prevent damage and maintain a fresh appearance. Store your RV in a shaded area or use a high-quality cover to protect it from UV rays and weather damage. Always drain water systems in winter to avoid freezing and cracking. Inspect and replace worn-out seals and gaskets to prevent leaks. Use RV-specific cleaning products to avoid damaging surfaces. Keep tires properly inflated and protect them from direct sunlight with tire covers. Avoid overloading your RV, as this can strain the chassis and suspension. Regularly service the generator and batteries to ensure optimal performance. By following these tips, you can significantly extend the lifespan of your RV and enjoy it for years to come. Consistent care and attention will pay off in the long run.

Common RV Repairs and Solutions
Addressing leaks, electrical issues, and plumbing problems are common RV repairs. Regular inspections and timely fixes can prevent minor issues from becoming major concerns.
Troubleshooting Common Issues
Troubleshooting common RV issues begins with identifying symptoms and consulting the repair manual. Start by understanding the problem, whether it’s electrical, plumbing, or mechanical.
- Check for error codes or unusual noises that indicate faulty systems.
- Perform a visual inspection to spot leaks, loose connections, or wear and tear.
- Use diagnostic tools like multimeters for electrical issues or pressure testers for plumbing.
Always prioritize safety by disconnecting power or turning off utilities before inspecting. Refer to the manual for specific troubleshooting guides tailored to your RV model.
Documenting the issue and the steps taken can help identify patterns and prevent future problems. If unsure, consult a professional to avoid further damage. Regular inspections and proactive troubleshooting are key to extending your RV’s lifespan.
DIY Fixes for Minor Damages
Minor damages to your RV, such as small dents or torn seams, can often be repaired with basic tools and materials. For exterior scratches, touch-up paint can blend the area seamlessly.
- Use a sealant for small cracks in windows or seals to prevent leaks.
- Replace worn-out gaskets or door hinges to maintain proper function.
- For interior tears in upholstery, fabric patches or adhesive can provide a quick fix.
Always clean the area before applying any adhesive or sealant for a stronger bond. Safety is crucial, so wear gloves and ensure the RV is stable before starting repairs.
Addressing minor issues promptly prevents them from becoming major problems. If unsure, consult the manual or seek professional help to avoid further damage. Regular DIY maintenance can significantly extend your RV’s lifespan.
When to Seek Professional Help
While DIY repairs are cost-effective, there are situations where professional assistance is essential. Major electrical or plumbing issues, such as system failures or complex wiring problems, require specialized expertise to avoid safety hazards.
- Chassis or suspension damage should only be handled by professionals to ensure road safety.
- Appliance malfunctions, like faulty refrigerators or air conditioning systems, often need precise diagnostics and tools.
- If time is critical, such as during a trip, professional intervention can minimize delays.
- Costly repairs may demand expert hands to prevent further damage or financial loss.
- Uncertainty about a repair’s complexity or safety should always prompt seeking professional help.
Knowing when to involve experts ensures safety, efficiency, and preserves your RV’s longevity. Don’t hesitate to consult a professional for intricate or high-risk repairs.

Electrical and Plumbing Systems
Understanding RV electrical and plumbing systems is crucial for reliability and safety. This section outlines key components, troubleshooting, and maintenance tips to ensure optimal performance and functionality.
Understanding RV Electrical Systems
RV electrical systems are designed to provide power for lighting, appliances, and essential functions. Most systems operate on 12V DC power from the battery or 120V AC power when connected to an external source. The converter/charger converts AC power to DC, charging the battery and powering DC devices. The circuit breaker panel distributes power to various components, protecting against overloads. Understanding voltage requirements, wiring diagrams, and safety protocols is essential for troubleshooting and maintenance. Key components include the battery, inverter (if equipped), and GFCI-protected outlets. Regular checks ensure proper function and safety. Familiarize yourself with fuses, breakers, and grounding systems to prevent electrical hazards. Always use a multimeter to diagnose issues like short circuits or faulty connections. Refer to your manual for specific voltage ratings and circuit layouts to maintain reliability and avoid damage to your RV’s electrical system.
Maintaining and Repairing Plumbing Systems
RV plumbing systems require regular maintenance to ensure water flows smoothly and prevent leaks. Start by winterizing the system to avoid freezing damage, using RV-specific antifreeze. Inspect hoses, connections, and valves for signs of wear or cracks. Replace worn-out washers or gaskets promptly to prevent water leaks. Use a water pressure test kit to check for system integrity. Always drain the water heater and fresh water tank when not in use for extended periods. For repairs, use high-quality, UV-resistant hoses and fittings designed for RVs. Be cautious of water pressure, as excessive force can damage pipes. Keep a set of basic plumbing tools, such as pipe wrenches and Teflon tape, handy. Regularly sanitize the freshwater system to maintain water quality. Addressing minor issues early prevents costly repairs and ensures a reliable water supply while on the road.
Common Issues and Solutions
RV electrical and plumbing systems often encounter specific issues that can disrupt functionality. A common electrical problem is tripped circuit breakers or blown fuses, usually caused by overloaded systems or faulty appliances. To resolve this, identify and unplug the problematic device, then reset the breaker or replace the fuse. For plumbing, water leaks from hoses or connections are frequent. Inspect for loose fittings or worn-out seals and tighten or replace them as needed. Low water pressure in faucets may indicate a clogged aerator or blocked water filter. Clean or replace these components to restore flow. Corroded electrical connectors can cause malfunctions; clean them with a wire brush and apply a protective coating. Always refer to your RV repair manual for specific guidance, and address issues promptly to avoid further damage. Regular inspections can help prevent these common problems from escalating.
Chassis and Suspension Maintenance
Regular chassis and suspension checks ensure stability and control. Lubricate axle and suspension components, inspect for wear, and tighten loose bolts to maintain optimal performance and safety.
Importance of Chassis Maintenance
Chassis maintenance is crucial for ensuring the structural integrity and safety of your RV. The chassis supports the entire vehicle, including the engine, axles, and suspension system. Neglecting chassis maintenance can lead to alignment issues, uneven tire wear, and reduced handling. Regular inspections help identify rust, cracks, or damage that could compromise safety. Lubricating suspension components and checking bolts ensures proper stability. Additionally, maintaining the chassis prevents costly repairs and extends the lifespan of your RV. A well-maintained chassis also improves fuel efficiency and overall performance. By addressing issues early, you can avoid breakdowns and ensure a smooth, safe driving experience. Always refer to your RV repair manual for specific maintenance schedules and procedures tailored to your vehicle’s needs.
Checking and Replacing Suspension Components
Regularly inspecting and replacing suspension components is vital for maintaining your RV’s stability and ride comfort. Over time, shock absorbers, springs, and stabilizers can wear out, leading to poor handling and safety risks. Inspect for signs of damage, such as leaks, rust, or excessive movement. If components are worn or damaged, replace them promptly to prevent further damage to the chassis or axles. Always refer to your RV repair manual for specifications and torque values. Replacing suspension parts ensures proper weight distribution and improves braking performance. If unsure, consult a professional to avoid improper installation. Neglecting suspension maintenance can lead to reduced control on the road, making regular checks essential for safe and enjoyable travels.
Aligning and Balancing Wheels
Proper wheel alignment and balancing are crucial for ensuring a smooth and safe RV driving experience. Misaligned wheels can cause uneven tire wear, reduced fuel efficiency, and poor handling. Use a wheel alignment tool to check and adjust the camber, caster, and toe angles as specified in your RV repair manual. Balancing wheels prevents vibrations and extends tire life. Use a wheel balancer to distribute weights evenly around the rim. Always perform these tasks on a level surface and after replacing tires or suspension components. If unsure, consult a professional technician. Regular alignment and balancing ensure optimal performance, improve safety, and prevent premature wear on your RV’s tires and chassis. Neglecting these steps can lead to costly repairs and compromised control on the road.

Appliance Maintenance and Repair
Regular inspections and cleaning of RV appliances ensure optimal performance. Check for damage, wear, and proper function. Refer to your manual for specific maintenance guidelines. Replace faulty parts promptly to avoid further damage and ensure safety. Proper installation, usage, and storage prolong appliance life, enhancing your RV experience.
Maintaining RV Appliances
Regular maintenance of RV appliances is crucial for ensuring reliability and longevity. Start by inspecting appliances for any signs of damage or wear. Clean filters, vents, and surfaces to improve efficiency and prevent overheating. Refer to your RV repair manual for specific maintenance schedules and guidelines. Properly store appliances when not in use to avoid exposure to harsh weather conditions. Lubricate moving parts and check connections to ensure optimal performance. Address minor issues promptly to prevent them from escalating into major repairs. Always follow the manufacturer’s recommendations for cleaning products and maintenance procedures. Regularly check appliance seals and gaskets to maintain airtight performance. By adhering to these practices, you can extend the life of your RV appliances and enjoy consistent performance during your travels.
Repairing and Replacing Faulty Appliances
Repairing or replacing faulty RV appliances requires a systematic approach to ensure safety and functionality. Begin by identifying the issue using the troubleshooting guide in your RV repair manual. If the problem is minor, such as a faulty fuse or loose connection, address it with basic tools. For complex issues, consider whether a DIY repair is feasible or if professional assistance is needed. Always disconnect power and gas supplies before starting any repair. When replacement is necessary, ensure the new appliance matches the specifications outlined in the manual. Keep a list of replacement parts and contact information for suppliers handy. DIY repairs should only be attempted if you are confident in your skills, as improper fixes can lead to further damage or safety hazards; Regularly updating your manual with repair notes can help track appliance history and prevent future issues.
Resources for RV Owners
RV owners can access repair manuals through official manufacturer websites, RV forums, and online retailers like Amazon, ensuring easy access to essential maintenance guides.
Finding Free RV Repair Manuals Online
Locating free RV repair manuals online can be a cost-effective solution for DIY enthusiasts. Many manufacturers offer downloadable PDF versions of their manuals on official websites. Websites like ManualsLib, Scribd, and RV forums often host a wide range of manuals. Additionally, online communities such as Reddit’s RV repair groups frequently share links to free resources. When searching, use specific keywords like “RV model repair manual PDF” to narrow results. Be cautious of third-party sites to ensure reliability. Always verify the manual’s relevance to your RV’s make and model. Some libraries and local RV associations also provide free access to repair guides. Utilizing these resources can save money while keeping your RV in top condition. Remember to check for updated versions to ensure accuracy and safety in repairs.